
If you're just happening upon the hop, you'll want to make sure to start at the beginning, at Kim's blog, so you don't miss any of the gorgeous creations being featured tonight.
I'm super excited to be showing you the new Sassy & Sweet stamp set. I am in LOVE with this stamp set. It screams "girly" and offers fun prints and a beautiful font that combine effortlessly to create jaw-dropping cards (in my humble opinion LOL).

I stamped the zebra print stamp in black and clear embossed. The leopard print was stamped in Pink Petunia Versamagic ink in Bubblegum card stock and then I colored the center of the spots with Copic R85. I LOVE that look! The oval frame was stamped and then I added the sentiment.

I found the adorable zebra print brads at Hobby Lobby under the Paper Studio Spare Parts brand. CUTE and so fitting for this stamp set!

I created the bow with my Bow Easy and used a big ol' Prima flourish I also bought at Hobby Lobby. I just love those fun prints stacked for my focal point.

Here are the dies I used on my card:


I wanted to show you a fun feature with the way the Sassy & Sweet stamp set works with the Sweet Stack Die-namics die set. It was designed to be super easy to use and made so that the patterns cover the die-cut shapes perfectly.
First stamp your zebra print on a piece of card stock.

Look how the die lines up! You need a stamp positioner or any tricks, Simply center your die over your stamped image. Part of the image will be peeking out to allow you to position is EASILY! (LOVE that) PS: The four little holes you see in the die are to help in poking the die-cut out should it ever get stuck in there.

See? some of the pattern is left behind on your paper. You can be "off" a little and still be ok. A margin for error is ALWAYS a good thing.

We all know leopards have spots, but leave it to me to want PINK spots. LOL I grabbed my Copic R85 and my Pink Petunia Versamagic ink pad.

I stamped the leopard print stamp on Bubblegum card stock.
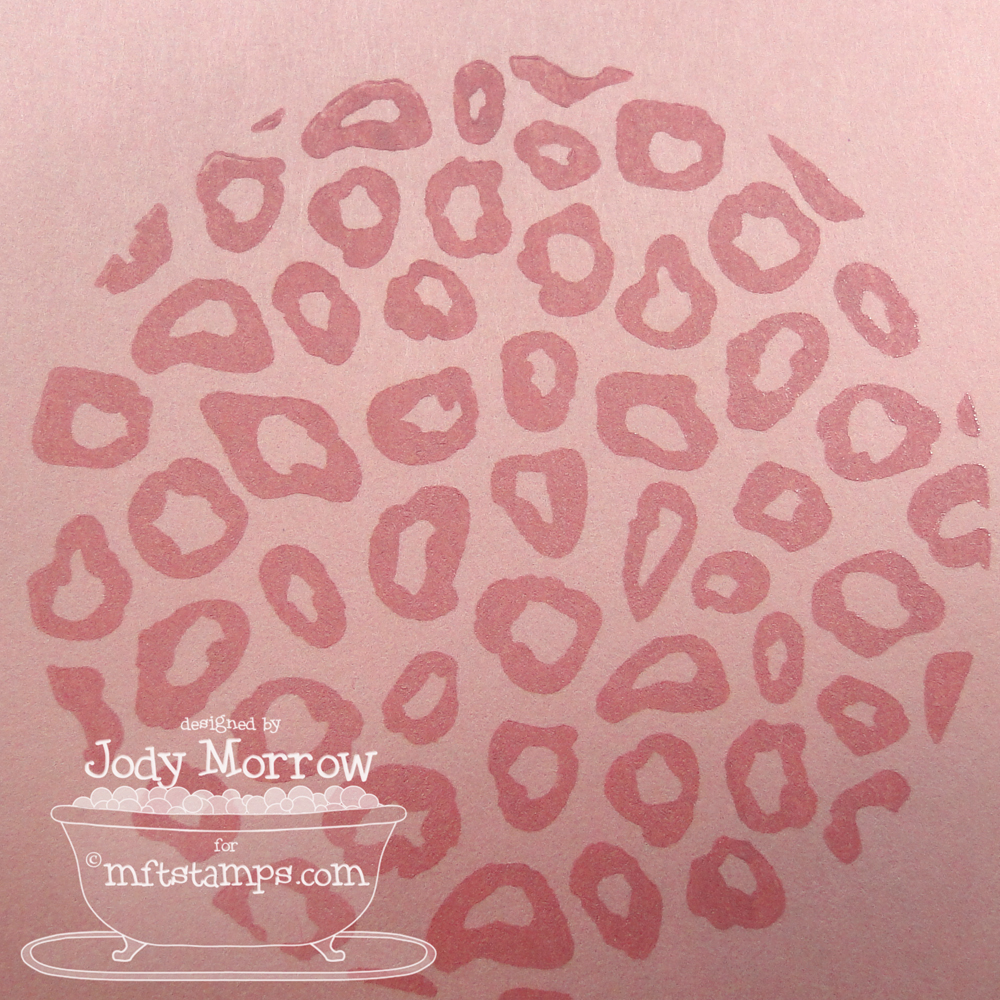
I colored the center of each spot with Copic R85. You don't have to be super exact. Just dab your marker in there. I found that when I overlapped the ink a little, it added more depth to the spots. Imagine doing this with other colors? Cute!

The stamp is also designed for easy die-cutting with the pattern extending through the whole piece. It's super easy to use.

Now let me show you one more trick for getting the frame stamp centered perfectly on the die-cut. My friend Barbara showed me how to do this and it is PERFECT for centering Die-namics die and matching stamps. I use this method all the time.

Die-cut the label shape using some scrap card stock and keep the "negative" portion of the die-cut as shown. Stamp the frame shape on some scrap white card stock.

Center the stamped frame within the opening of the "negative" die cut piece and keep in place with scotch tape. (you'll tape the two pieces of card stock together)

Then, you'll need to lay the taped-together card stock on the cutting plate of your die-cut machine. I use a Sizzix Big Shot. Place your Die-namics label in the "groove" of the top piece of card stock. Make sure it is properly. Then run it through your die-cutting machine.

As long as you have done the above steps properly, you will be left with a perfectly cut out (and centered) frame. You can reuse the negative die-cut piece. Just take apart the two layers and save them for next time.


I'm sure you're ready to hop along, so it's time for me to send you on your way. You're off to the uber talented, Arlene.
See you soon for Wednesday Stamp Club. :)


AWESOME tute!!! and look at all that bling - soooo awesome!
ReplyDeleteGET OUT!!!!!!!!!!!!! OMG, I LOVE this Jody! So much to see--I keep staring at it!
ReplyDeletealways great tips! and wow! love the copic on the leopard print....it's adds so much!!!
ReplyDeletethis is so beautiful, love the colors and the bling!
ReplyDeletelove how you used the leopard prints on this
ReplyDeleteOmg, gorgeousness!!! I've never used these products before, but that's it! I'm sold! This card is too fabulous!
ReplyDeletebeautiful card, and the image bleeding off the die cut area is brilliant as are the holes to poke the paper out if it gets stuck.
ReplyDeleteooooh-eeeeeem-geeeeee Jody!! This is beyond gorgeous girlie, I {heart} this card! :-) Love the tut too, thanks for sharing that!
ReplyDeleteThis is just such a great card! Love the colors and the leopard print is so very cool!
ReplyDeleteSO beautiful - I can't stop staring at it!
ReplyDeleteThese are really amazing cards!! I just love the sassy, girlie feel. I can't wait to play with this set more. And that is a great idea for lining up the die!
ReplyDeleteAwesome card Jody! I love the kitty vrough vrough look! LOL thanks so much for the great tips! BTW it was fun attending my 1st release party! Normally the night time routine interfere with it but I snuck away tonight!
ReplyDeleteGorgeous card Jody! I love the on-trend animal prints ;)
ReplyDeleteSome great crafty tips there too - thanks! Ruth S
Jody this is just beautiful...and I keep finding something else on it that I love. Thanks for sharing the tips!
ReplyDeleteAmazing card!
ReplyDeleteJody, you blew me away with this one! SO gorgeous! :)
ReplyDeletelove love LOVE the use of the dies and bling!! perfect card :)
ReplyDeletegorgeous & i LOVE LOVE your pink leopard spots! thanks for showing us a close up of how these cut- i can't wait!!
ReplyDeleteWhat a fabulous card! The animal print is amazing! Wow oh wow!!!
ReplyDeleteI love the color combinations you used! Thanks for sharing!
ReplyDeleteAbsolutely gorgeous card and embellishments.
ReplyDeleteGorgeous, and look at you letting yourself go with those crystals! I'm too stingy when I use mine... gotta be more FREE and uninhibited like you. Would you please make up some rules where these are concerned so I know how to do it right? Thanks in advance, Teacher! :)
ReplyDeleteThanks so much for another fab tutorial Jody, your card ROCKS!
ReplyDeleteI love how the stamps are a titch larger--perfect design idea! The font, the animal print, the sentiments--all make for a fab set. Great card!
ReplyDeleteLove your card and all the unique details!! Excellent job on the pink zebra stamping and coloring!
ReplyDeleteSassy card! Love this set!
ReplyDeleteI LOVEEEEEEEEEE this card!!! LOVE the pink spots, the bling, the zebra brads...LOVE!!!!!!!!!!!!
ReplyDeleteNice work thanks for the step by step!
ReplyDeleteOMG! LOVE how you did the leopard spots! SO casing that! GORGEOUS GORGEOUS GORGEOUS! I LOVE this set!
ReplyDeleteThis is so fabulous...LOVE it!!!
ReplyDeleteWow! So feminine, so blingy, so...beautiful! Thaks for the great tips and "tricks"!
ReplyDelete