
I was SO excited to make a nugget box. I find the pattern, make it and I think EWWWWWWW I can see white... I can see folds.... I can see flaps... yuck yuck yuck. Why did that bother me? My great friend Tracy tried reasoning with me. She said when you put the nuggets in, no one can see that part. Ummm MUST FIX NUGGET BOX. My journey ensued. I was on a mission. I wanted a nugget box with clean lines and pattern everywhere, here is my journey. :)
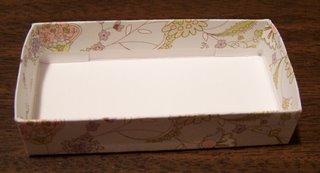
This is exhibit A. This was made using the nugget box pattern I found.
I fiddled with the pattern and wasted quite a bit of patterned paper. However, in the end I got my wish and here is the tutorial.
Box dimensions: 6 1/2 X 7 1/4
score at 1/2, 1 1/4, 2, 3 1/2, 4 1/4, 5
score other side at 3/4, 1 1/2, 5 3/4, 6 1/2
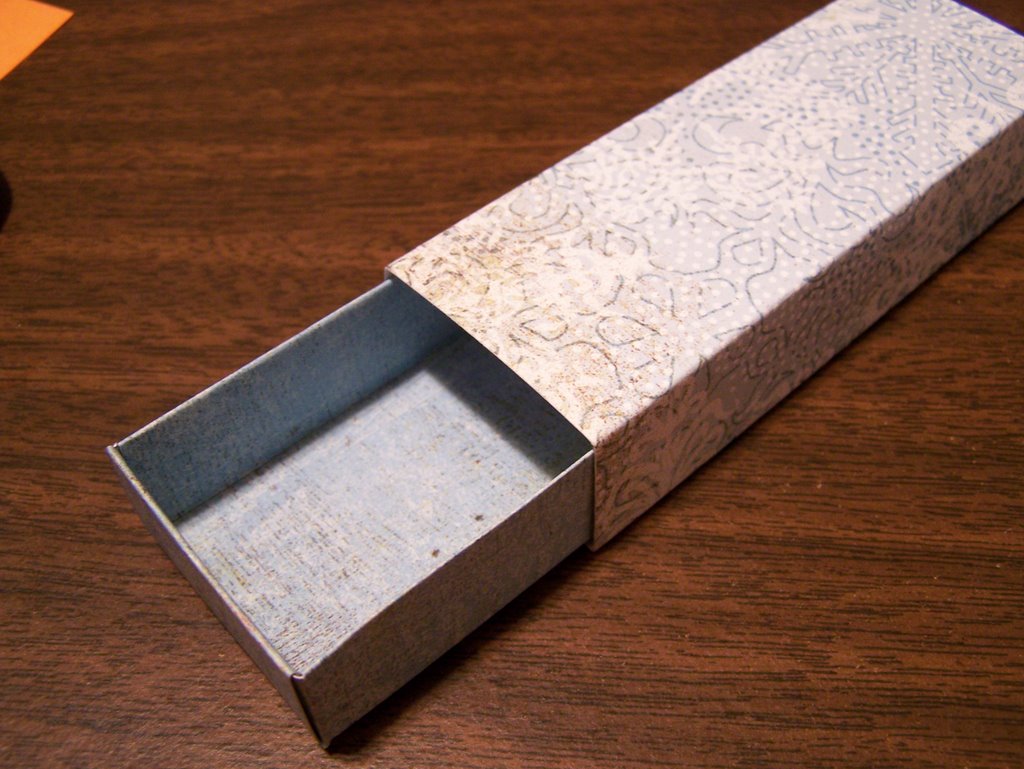
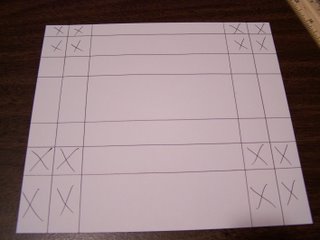 Cut out all the sections with an X in them.
Cut along score lines as shown below
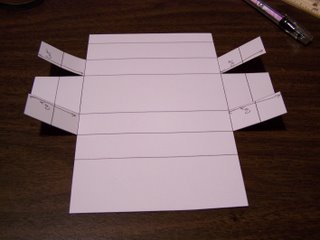
NOTE: Box will NOT be symetrical
Place tape along the outermost edge of the shortest side as pictured below
 Now, tape down as shown
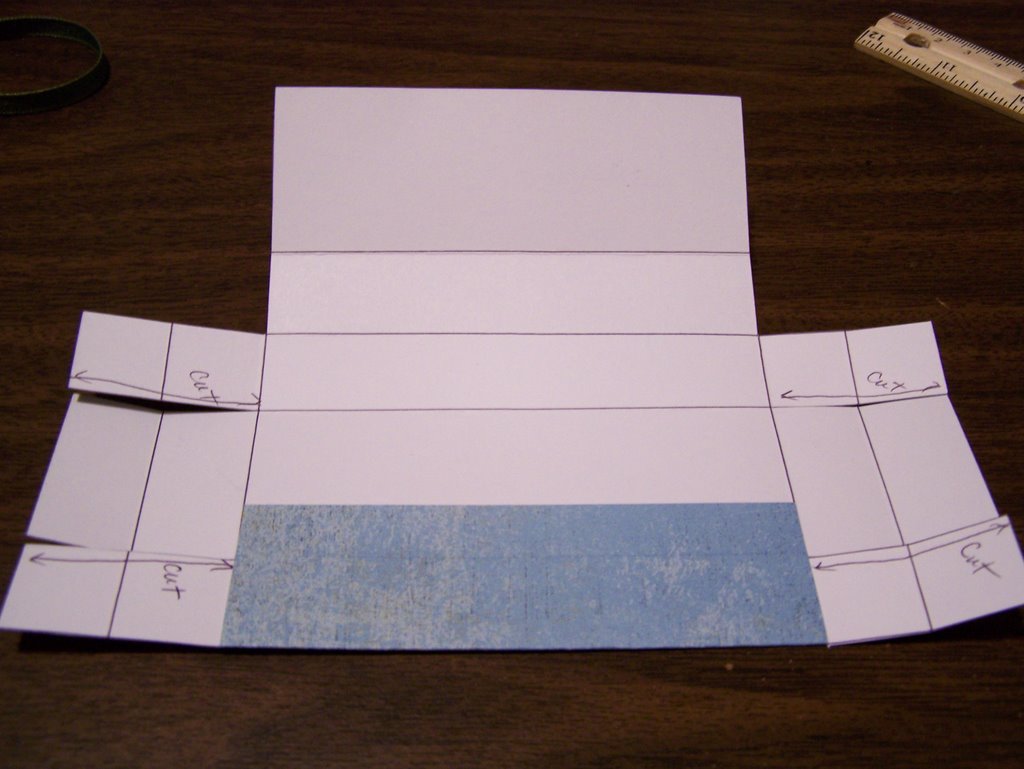
Place tape on the larger outermost section and tape down also. It will slightly loverlap the piece you previously taped down.

Fold sides up
.jpg)
Tuck in end flaps and put tape in area shown and fold OVER the end flaps and stick down. Repeat on the opposite end.
.jpg)
VOILA! No white showing! This nugget box looks finished on the outside as well as the inside.
.jpg)
Cover dimensions: 6 X 4 3/8
score at: 1 1/4, 2 1/8, 3 5/8, 4 1/2
fold on score lines, wrap around box and adhere.


LOL - girl you kill me! love both nugget boxes!! I haven't made one of these yet, but double-sided pp work to eliminate the 'white'? might have to try and see! :)
ReplyDeleteWhat a fantastic tutorial, Jody!
ReplyDeletesuper cute! great tutorial!
ReplyDeleteabsolute perfection!
ReplyDeleteGreat job on getting that ironed out Jody! I know it drove you crazy! :)
ReplyDeleteJody...pure genius I tell ya!!! I have yet to try one but I am with you, the unfinished look would drive me batty. Love your blog!
ReplyDeleteI gotta say, I tried to make one Wednesday, and that was bothering me too!!! I just didn't have the time to tinker with it!!! Thanks Jody! ;)
ReplyDeleteSpeaking for all of the perfectionists out there - THANKS for taking the time to figure this out. I love it - it looks awesome!!!
ReplyDeleteI am so glad you did this! I made one of the others and didn't like it, so haven't made another. It didn't dawn on ME to try to reinvent the pattern! Ü
ReplyDeleteNow I gotta try this again using your tutorial.
Debbie
Jody you are so funny. It would bother me too, but I wouldn't do anything about it! You did an amazing job and i think the new and improved id just that, New and Improved! You go girl. :)
ReplyDeleteYou are too funny but sm'art! I love this. Very cretive girlie.
ReplyDeleteGet better soon!
i love your box..but i was looking at the cover dimensions..isn't 4 3/8's less than 4 1/2" ? I'm confused? I'd appreciate any help.. I really want to try this box for christmas for my daugher's teachers. TIA!
ReplyDelete*lol* both boxes are really nice, I think your looks steadier though. I´ll have a go on both as soon as I figure out what to put in them... No nuggets i Sweden :(
ReplyDelete