I had a lot of fun using the new products, and started with the super cool Scalloped Treat Box and Red Delicious Die-namics dies. I was bound and determined to figure out how to make a SQUARE box with the Scalloped Treat Box die, and I DID IT. :) There is a tutorial at the end of this post, so if you are interested in learning how to make your die even more versatile, keep on scrolling.
I created a caramel apple kit to give away as a cute little gift. After creating the square Scalloped Treat Box, I added a row of Kraft Caramel to the bottom of the box (you can fit 9 caramels in there). Then, I added some kraft colored paper shred and then a pretty (small) green apple. I decorated the front with a "caramel apple", which I created using the Red Delicious Die-namics.
Here is a peek at the back-side of the box. I distressed in Kraft ink along all the seams of the box.
I stamped the word "sweet" from Birthday Sentiments stamp set in Hot Fudge ink on my Kraft "popsicle stick" I made with the Sentiment Strips Die-namics.
I coated the apple with Distress Crackle Paint in Rock Candy, to add some shine and "sugary" appearance. To cut the top of the "caramel" portion of the apple, I used the Snow Drifts Die-namics.
The green apple was cut from Sour Apple Card Stock (not a coincidence LOL) and I added realistic speckles using my SU Air Art Tool (old school) and a dye based marker. The caramel portion and stem were distressed with Kraft ink and I brayered the Kraft leaves with Gumdrop Green ink to draw out the embossed veins of the leaves.
For a full tutorial on this project, be sure to scroll all the way to the end of this post. :)
Next up, I created this fun and easy ROYGBIV rainbow card using one of my favorite stamp sets from MFT EVER, Mod Borders. *swoon*
I stamped the "arrows" in Electric Red, Orange Fizz, Lemon Drop, Sour Apple, Sno Cone, Blu Raspberry, and Grape Jelly. The sentiment, from Birthday Sentiments, was stamped in Black Licorice ink. I pierced tiny holes just below the sentiment to add a little pizazz.
Next up, I grabbed my Traditional Tags STAX and created this large tag using several new products.
I used the largest of the tags, cut in Kraft Card Stock, and die-cut the 4U using Bottom Line Alphabet Die-namics and Bottom Line Numbers and Symbols.
I added a flower using Sweet Roses and the coordinating dies, Roses and Leaves. The stem is from Flower Box, and I added a Lemon Drop button in the center that was threaded with Hemp Cord.
The tiny strip of triangles was stamped using Mod Borders in Razzle Berry and then trimmed down to include only three rows of triangles.
At the top, I added a stitched circle from Blueprints 1 and then tied some Razzle Berry Ribbon through it in a simple "bow".
I added it to a clear paint can with some paper shred in it. Now, I just need to toss in some sweet treats, and I'll have an easy gift.
Now, let me show you how to create a square treat box using Scalloped Treat Box Die-namics.
Cut 4 pieces and cut away half the side flap, like this:
This is what you are left with.
This is how it will assemble (for reference):
Add adhesive, as shown (to all 4 pieces):
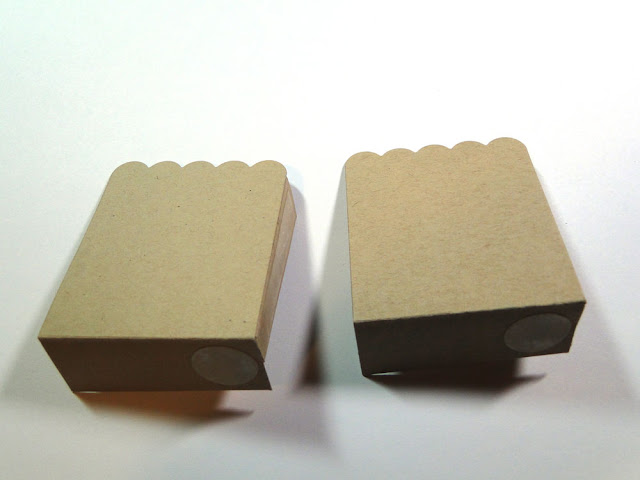
Assemble all 4 sections of the box, like this (picture shows only 2 of the 4 pieces).
Adhere two of the pieces together:
Add a third piece:
The 4th piece will go in as shown. Half will fit outside the box, the other half will slide "in" the box.
You'll have a hole in the center of the box, so you'll need to cut an insert for the inside. 2 7/16 X 2 7/16".
I used liquid glue to glue my inner base.
Now, flip the box over and adhere an outer base to the bottom of the box. This one is 2 1/2 X 2 1/2". I used red line tape.
It will look like this:
Now, simply decorate your box. :)
Thanks for stopping by. Please head over to the MFT Blog for a full list of participating designers. You'll find plenty of inspiration. :)
And remember, the new MFT products are available NOW, right HERE.


These are all so fabulous, love the tutorial, thank you!
ReplyDeleteJust loving your projects as always Jody!!! Thanks for the tutorial!!
ReplyDeleteahhhh totally fun projects, Jody! Love that caramel apple!!! FUN! Your CAS card rocks as well! I'm starting to give CAS more of my time these days. Your tag turned out wonderfully as well! Great inspiration!
ReplyDeletefabulous, Jody, love them!
ReplyDeletebrilliant! love your square box and LOVE the crackle detail you added to the deeeelish apple! mod borders is a FAVE of mine, too. you make it look beautiufl. cute tag, too! thanks for all the eye candy, Jody!
ReplyDeletereally neat..thanks for sharing!
ReplyDeleteomgosh these are all fantastic! i just love all the new MFT ink colors- so pretty! & thanks for the awesome tutorial- i will totally be making square boxes too! i LOVE the apple gift- you so rocked the details!!
ReplyDeleteWhat great projects! That caramel apple looks good enough to eat, but I think my favorite is the tag. The bright flower, the stitched circle on top, the stamped border... It's perfect!!!
ReplyDeleteTricia
What a great set of projects Jody! Love the caramel covered apple and your sweet treat box! Thanks for sharing the how to!
ReplyDelete